Install Booking Page
If you're on a Basic Plan or above, you can seamlessly embed your Re:catch booking page into your website's inbound lead form. This allows your leads to effortlessly schedule meetings with your team directly from your website.
Follow these steps to install a booking page on your website:
Install Re:catch on your website's inbound lead form

Copy your installation code snippet
Click 'Share' on the top right corner of the booking page, and select 'Web Form Embed' tab.
Choose between light and dark mode to align with the style of your website.
IMPORTANT : Include the HTML 'form' class on your website's form to integrate the booking page. Note: If you already have a form, find the 'form' class following the instruction below. If you haven't assigned a form class yet, add one in this step first and then apply the same class name when building your form.
To locate the <form class>, visit the webpage containing your form, open the Developer Tools (right-click -> select 'Inspect'), and identify the code snippet containing theform element. Look for code resembling what you can see in the 'Integrate Custom Web Form' guide, then identify the form tag resembling <form class ="abcde"...>. Then, copy the "abcde" as your form class!
If you would like to view and analyze user data from your website visit to their form submission (e.g. website to form submission conversion rate), click 'Collect Visitor Data'.
Once you've finished configuring all the settings, simply click 'Copy' to copy the installation code snippet.
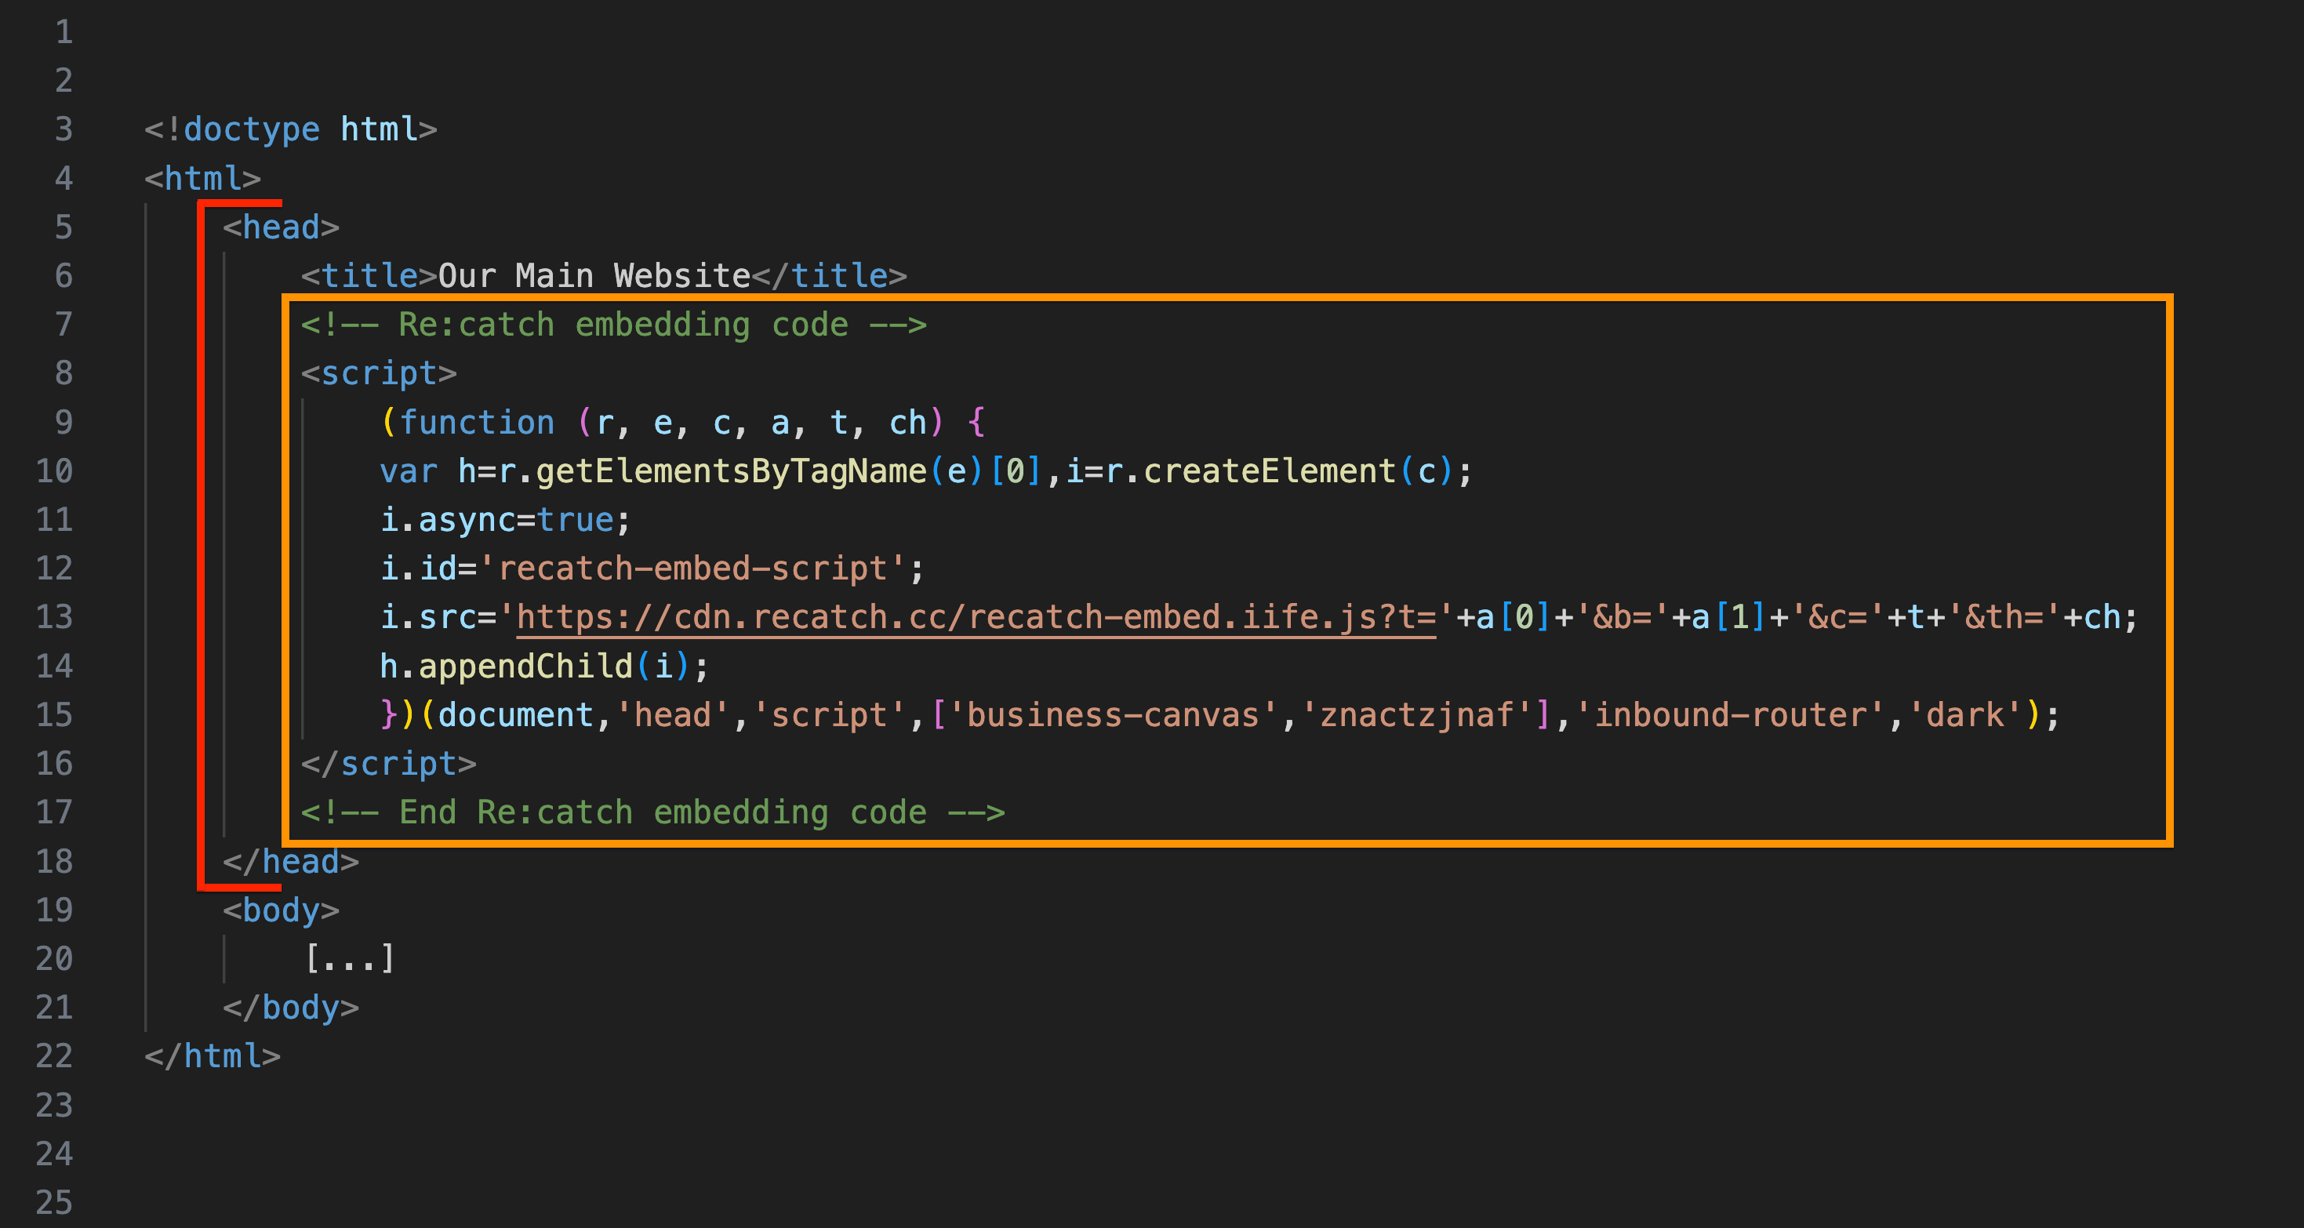
Apply the installation code snippet
Navigate to the HTML code of the webpage that contains the form where you want to install Re:catch. Then, paste the copied code snippet into the
<head>section of the HTML.

(Optional) If you want to match the information you're already gathering with Re:catch Booking Page, you can configure the
<input>field names as follows: Name: <input name = name> Email: <input name = email> Phone Number: <input name = phone-number>

You're all set! Once you've saved the changes and published your website, any leads who submit their details on your form will be able to smoothly schedule a meeting with you using Re:catch.
Facing issues while installing on your form?
We provide guidance for various website types, so determine which of the following form types matches yours and find detailed instructions on integrating a custom web form:
Imweb
Webflow
Framer
Hubspot
Framer
Last updated